


I’ve decided to move my content over to https://mattray.github.io since I’m primarily writing about technical topics and the Markdown-based Jekyll workflow is pretty simple. I’ll leave this site up for awhile, but please follow the link.
New Year: New Site
Posted by mattray on February 6, 2019
Posted in Uncategorized | Leave a Comment »
Chef 14 ARM on the BeagleBone Black – UPDATED 14.5.33
Posted by mattray on April 4, 2018
Chef 14 is now available and there are a few minor updates from the Chef 13 ARM build. Looking forward to the “official” ARM builds, but for now here’s what needed to be updated.
Ruby 2.5.0
Chef 14 is built with Ruby 2.5.0, so the first step was to build the latest. I already had an omnibus user and rbenv installed, so it was simply:
sudo su - omnibus
bash
export PATH="$HOME/.rbenv/bin:$PATH"
eval "$(rbenv init -)"
rbenv install 2.5.0
rbenv global 2.5.0
gem install bundler
omnibus-toolchain
With Ruby 2.5.0 installed, I decided to update the omnibus-toolchain to the current release.
git clone https://github.com/chef/omnibus-toolchain.git
cd omnibus-toolchain
bundle install --without development
bundle exec omnibus build omnibus-toolchain
dpkg -i pkg/omnibus-toolchain*deb
cd
Chef 14.0.190
With omnibus-toolchain built with Ruby 2.5.0 I could now build Chef 14.
export PATH="$HOME/.rbenv/bin:/opt/omnibus-toolchain/bin:$PATH"
wget https://github.com/chef/chef/archive/v14.0.190.tar.gz
tar -xzvf v14.0.190.tar.gz
cd chef-14.0.190/omnibus/
bundle install --without development
bundle exec omnibus build chef -l debug
A few hours later I had my ARM Chef client .deb built. As the root user I installed it and ran it.
dpkg -i chef_14.0.190+20180403233706-1_armhf.deb
...
Thank you for installing Chef!
You may download the chef_14.0.190+20180403233706-1_armhf.deb or follow these instructions to build your own package for your platform.
UPDATE
Chef 14.1.1 is now available, I’ve built new 14.1.1 ARM packages updating the above to Ruby 2.5.1, the latest omnibus-toolchain and the Chef 14.1.1 source.
UPDATE 2
Chef 14.4.56 is now the latest stable build, so I’ve built new ARM packages. Ruby 2.5.1, omnibus-toolchain 1.1.90 and Chef 14.4.56 from source.
UPDATE 3
Chef 14.5.33 is the latest stable build, so new ARM packages are available. Ruby 2.5.1, omnibus-toolchain 1.1.90 and Chef 14.5.33 from source.
Posted in chef | Tagged: chef arm | 2 Comments »
Chef 13 on the BeagleBone Black UPDATED X4
Posted by mattray on May 12, 2017
![]()
Now that the Chef client 13 is available, I decided to upgrade my ARM build to the latest release. ARM is still not officially supported, but building was fairly straightforward. I had Chef 12.17.1 on the box already, but I needed to upgrade the build tooling first.
Ruby 2.4.1
Chef 13 is now using Ruby 2.4.1 in their build pipeline, so the first step was to build the latest. I already had an omnibus user and rbenv installed, so it was pretty simple:
  sudo su - omnibus
  export PATH="$HOME/.rbenv/bin:$PATH"
  eval "$(rbenv init -)"
  rbenv install 2.4.1
  rbenv global 2.4.1
  gem install bundler
omnibus-toolchain
Once Ruby 2.4.1 was installed, I decided to upgrade the omnibus-toolchain to the current release. I had to make a small patch (upstreamed), and build the latest:
  git clone https://github.com/chef/omnibus-toolchain.git
  cd omnibus-toolchain
  bundle install --without development
  bundle exec omnibus build omnibus-toolchain
  cd
Chef 13.1.12
Now I could finally get to installing Chef 13.1.12.
  export PATH="$HOME/.rbenv/bin:/opt/omnibus-toolchain/bin:$PATH"
  unzip v13.1.12.zip
  cd chef-13.1.12/omnibus/
  bundle install --without development
  bundle exec omnibus build chef -l debug
About 2 hours later I had my ARM Chef client .deb built. As the root user I installed it and ran it.
  root@beaglebone:/home/omnibus/chef-13.1.12/omnibus/pkg# dpkg -i chef_13.1.12+20170511092809-1_armhf.deb
  (Reading database ... 88226 files and directories currently installed.)
  Preparing to unpack chef_13.1.12+20170511092809-1_armhf.deb ...
  Unpacking chef (13.1.12+20170511092809-1) over (12.17.1+20161110041345-1) ...
  Setting up chef (13.1.12+20170511092809-1) ...
  Thank you for installing Chef!
UPDATED FOR CHEF 13.1.31
With the “official” release of Chef 13, I’ve updated the build and produced the Chef 13.1.31 build on ARM. Feel free to download the Chef 13.1.31 ARM client for the BeagleBone Black here: chef_13.1.31%2B20170605012947-1_armhf.deb
UPDATED FOR CHEF 13.2.20
Chef 13.2.20 is the newest stable build, download it here: chef_13.2.20%2B20170712062554-1_armhf.deb
UPDATED FOR CHEF 13.6.0
Chef 13.6.0 is the latest build, I updated rbenv to use Ruby 2.4.2 and then rebuilt the latest omnibus-toolchain. Download it here: chef_13.6.0%2B20171031060217-1_armhf.deb
UPDATED FOR CHEF 13.7.16
Chef 13.7.16 is the latest build, I updated rbenv to use Ruby 2.4.3 and then rebuilt the latest omnibus-toolchain. Download it here: chef_13.7.16%2B20180130212049-1_armhf.deb
Posted in Uncategorized | 1 Comment »
Chef 12.17.1 on BeagleBone Black UPDATE
Posted by mattray on November 10, 2016
![]() Now that I have Chef installed, I wanted to make a new build for Chef 12.17.1. The build version of Ruby used by omnibus-toolchain has upgraded to 2.3.1, so I had to add the following steps to clean up the previous Ruby and Chef installation:
Now that I have Chef installed, I wanted to make a new build for Chef 12.17.1. The build version of Ruby used by omnibus-toolchain has upgraded to 2.3.1, so I had to add the following steps to clean up the previous Ruby and Chef installation:
sudo apt-get remove ruby ruby-dev ruby2.1 rubygems-integration libruby2.1 ruby2.1-dev
sudo rm -rf /opt/chef/*
sudo chown omnibus:omnibus /opt/chef
And then build Ruby 2.3.1:
sudo su - omnibus
git clone https://github.com/sstephenson/rbenv.git ~/.rbenv
git clone https://github.com/sstephenson/ruby-build.git ~/.rbenv/plugins/ruby-build
export PATH="$HOME/.rbenv/bin:$PATH"
eval "$(rbenv init -)"
rbenv install 2.3.1
rbenv global 2.3.1
gem install bundler
Once that was in place I could go build the new Chef:
. load-omnibus-toolchain.sh
wget https://github.com/chef/chef/archive/v12.17.1.tar.gz
tar -xzf v12.17.1.tar.gz
cd chef-12.17.1/omnibus
bundle install --without development
bundle exec omnibus build chef -l debug
And approximately 2.5 hours later I had a new chef_12.17.1%2B20161110041345-1_armhf.deb which worked great once installed.
debian@beaglebone:~$ sudo dpkg -i /home/omnibus/chef-12.17.1/omnibus/pkg/chef_12.17.1+20161110041345-1_armhf.deb
(Reading database ... 96808 files and directories currently installed.)
Preparing to unpack .../chef_12.17.1+20161110041345-1_armhf.deb ...
Unpacking chef (12.17.1+20161110041345-1) over (12.15.27+20161013214455-1) ...
Setting up chef (12.17.1+20161110041345-1) ...
Thank you for installing Chef!
Feel free to download it: chef_12.17.1%2B20161110041345-1_armhf.deb
Posted in Uncategorized | 1 Comment »
Habitat and AWS’ Elastic Container Service
Posted by mattray on October 26, 2016
I was fortunate to present to the AWS Sydney North User Group on the topic “Build Better Containers for ECS with Habitat” (slides here). I was new to using Amazon’s Elastic Elastic Container Service (ECS) so I figured I’d document my findings as I went.
Habitat
If you’re unfamiliar with Habitat, go read through the introduction and try out the tutorial. It’s a new project with the ambitious goal of providing
Application automation that enables modern application teams to build, deploy, and run any application in any environment – from traditional data-centers to containerized microservices.
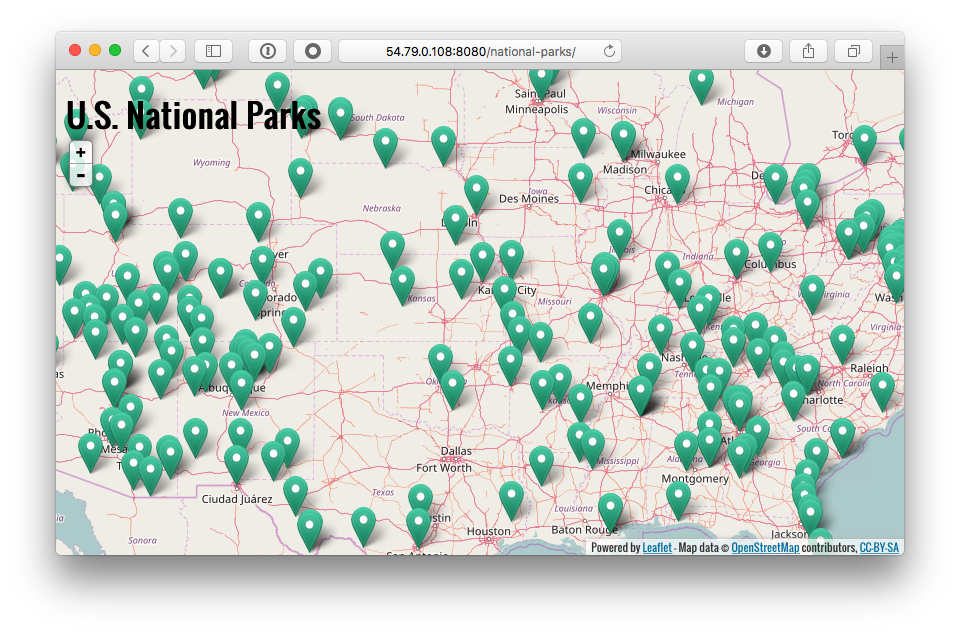
I’m not going to dive too far into Habitat, but it makes building portable applications and exporting them to Docker really easy. For the demonstration purposes, I reused the National Parks demo from this recent Chef blog post.
The National Park plan Bill used in his blog post was published to GitHub and the MongoDB plan was published to the Habitat depot, so I could build my own docker containers with them. Assuming you have Habitat already installed and your docker-machine running, you can build docker images for the Mongo database and National Parks Tomcat application (after checking it out from GitHub).
  $ git clone git@github.com:billmeyer/national-parks-plan.git
  $ cd national-parks-plan
  $ hab studio enter
And once you’re in the studio
  [1][default:/src:0]# build
  ...
  [2][default:/src:0]# hab pkg export docker mattray/national-parks
  ...
  [3][default:/src:0]# hab pkg export docker billmeyer/mongodb
After exiting the studio, your docker images are ready.
  $ docker images
  REPOSITORY                                                                 TAG                    IMAGE ID            CREATED             SIZE
  billmeyer/mongodb                                                          3.2.6-20160824195527   dc1e785cb432        8 seconds ago       301 MB
  billmeyer/mongodb                                                          latest                 dc1e785cb432        8 seconds ago       301 MB
  mattray/national-parks                                                     0.1.3-20161026234736   bdf5dc7b7465        32 seconds ago      708.5 MB
  mattray/national-parks                                                     latest                 bdf5dc7b7465        32 seconds ago      708.5 MB
  habitat-docker-registry.bintray.io/studio                                  0.11.0                 7ebd429888ef        12 days ago         293.4 MB
EC2 Container Registry
Once we’ve got our containers built locally it’s time to move them to Amazon’s EC2 Container Registry, their private Docker Registry. I’m not going to go into the specifics of configuring your AWS developer setup, but you’ll need the aws and ecs-cli tools installed. First we’ll need to login to the ECR registry
$ aws ecr get-login
and take this output to login to our new ECR docker registry.
$ docker login ...
Habitat put the containers into namespaces of billmeyer/mongodb and mattray/national-parks, so we’ll need to create these within ECR.
  $ aws ecr create-repository –repository-name billmeyer/mongodb
  ...
  $ aws ecr create-repository –repository-name mattray/redis
  ...
Once we have these we’ll tag and push our images to the ECR (note you’ll need your aws_account_id and availability zone).
  $ docker tag billmeyer/mongodb:latest aws_account_id.dkr.ecr.ap-southeast-2.amazonaws.com/billmeyer/mongodb:latest
  $ docker tag mattray/national-parks:latest aws_account_id.dkr.ecr.ap-southeast-2.amazonaws.com/mattray/national-parks:latest
  $ docker push aws_account_id.dkr.ecr.ap-southeast-2.amazonaws.com/billmeyer/mongodb:latest
  The push refers to a repository [aws_account_id.dkr.ecr.ap-southeast-2.amazonaws.com/billmeyer/mongodb]
  2922e8bbae38: Pushed
  latest: digest: sha256:105add47da75fb85ba605a0bdf58a4877705c80d656955b55792005267365a11 size: 5920
  $ docker push aws_account_id.dkr.ecr.ap-southeast-2.amazonaws.com/mattray/national-parks:latest
  The push refers to a repository [aws_account_id.dkr.ecr.ap-southeast-2.amazonaws.com/mattray/national-parks]
  b3ddf26b58dc: Pushed
  latest: digest: sha256:9a74d0cddd5688e126d328527d63c5225d2ce320da67cadfc73fdf92f2fd1dcf size: 6676
EC2 Compute Service
Now that our docker images are pushed to ECR, let’s run them on Amazon’s ECS. First we’ll need to set up our ecs-cli tooling:
$ ecs-cli configure --cluster hab-demo
which creates a ~/.ecs/config file that may need your credentials. With that in place, we can provision EC2 instances to host our containers.
$ ecs-cli up --keypair mattray-apac --capability-iam --size 2 --instance-type t2.medium --port 22
This creates a Cloudformation stack with 2 t2.medium Amazon Linux’s ECS-tuned hosts with SSH access open. If you have an existing VPC, you could add the cluster to it and attach a security group opening up any additional ports you may need. For this demo I went into the AWS console and opened inbound port 8080.
The National Parks application is in a Docker compose np-demo.yml script:
  version: '2'
  services:
    mongo:
      image: aws_account_id.dkr.ecr.ap-southeast-2.amazonaws.com/billmeyer/mongodb:latest
      hostname: "mongodb"
    national-parks:
      image: aws_account_id.dkr.ecr.ap-southeast-2.amazonaws.com/mattray/national-parks:latest
      ports:
        - "8080:8080"
      links:
        - mongo
      command: --peer mongodb --bind database:mongodb.default
We have the mongo and national-parks services and use the docker images from the ECR. The docker compose documentation indicates that links should create /etc/hosts entries, but this does not appear to currently work with ECS so we assign the hostname: "mongodb" so we can have Habitat automatically peer to this node and connect the National Parks Tomcat application to Mongo. links does manage the deployment order of the containers, so it’s still worth using. We launch our ECS Task with
$ ecs-cli compose --file np-demo.yml -p np-demo up
From the AWS console, find the public IP address of the ECS host in the cluster and connect to it at http://ecs-host-ip:8080/national-parks
You can also SSH to this host to run docker commands locally (ie. docker logs) for debugging purposes.
Posted in aws, chef, docker | Tagged: aws, chef, docker, ecr, ecs, habitat | Leave a Comment »
Building Chef on the BeagleBone Black
Posted by mattray on October 20, 2016
![]() I wanted to get Chef running on my BeagleBone Black running Debian, using the full-stack Omnibus builder they use for their packages. While ARM is not a supported platform, the open source community had already done a lot of work getting it ready. The first step was to get the build toolchain in place, so I followed the instructions from https://github.com/chef/omnibus-toolchain. I had to make 1 small fix (already merged), but here’s how I got omnibus-toolchain installed:
I wanted to get Chef running on my BeagleBone Black running Debian, using the full-stack Omnibus builder they use for their packages. While ARM is not a supported platform, the open source community had already done a lot of work getting it ready. The first step was to get the build toolchain in place, so I followed the instructions from https://github.com/chef/omnibus-toolchain. I had to make 1 small fix (already merged), but here’s how I got omnibus-toolchain installed:
sudo apt-get install autoconf binutils-doc bison build-essential flex gettext ncurses-dev libssl-dev libreadline-dev zlib1g-dev git libffi6 libffi-dev ruby ruby-dev
sudo gem install bundler
git clone https://github.com/chef/omnibus-toolchain.git
cd omnibus-toolchain
sudo bundle install --without development
sudo bundle exec omnibus build omnibus-toolchain
sudo FORCE_UNSAFE_CONFIGURE=1 bundle exec omnibus build omnibus-toolchain
Note the FORCE_UNSAFE_CONFIGURE=1, there was a bug in gtar that I didn’t debug.
Luckily Carl Perry already had an ARMHF Chef 12.8.1 build available for bootstrapping.
After installing the package locallly
dpkg -i /tmp/chef_12.8.1%2B20160319051316-1_armhf.deb
I did a chef-client run remotely
$ knife bootstrap 192.168.0.11 -x debian --sudo -N beaglebone
Creating new client for beaglebone
Creating new node for beaglebone
Connecting to 192.168.0.11
192.168.0.11 -----> Existing Chef installation detected
192.168.0.11 Starting the first Chef Client run...
192.168.0.11 Starting Chef Client, version 12.8.1
192.168.0.11 resolving cookbooks for run list: []
192.168.0.11 Synchronizing Cookbooks:
192.168.0.11 Installing Cookbook Gems:
192.168.0.11 Compiling Cookbooks...
192.168.0.11 [2016-10-13T07:53:21+11:00] WARN: Node beaglebone has an empty run list.
192.168.0.11 Converging 0 resources
192.168.0.11
192.168.0.11 Running handlers:
192.168.0.11 Running handlers complete
192.168.0.11 Chef Client finished, 0/0 resources updated in 14 seconds
The next step was to get the omnibus cookbook in place to use my machine as a builder. After sorting through the dependencies and getting it uploaded, I had to make 1 small change to disable grabbing the omnibus-toolchain because I had already built it locally. Once that was in place, it was a matter of sudoing to the omnibus user, downloading the Chef source and running
. load-omnibus-toolchain.sh
cd chef/omnibus
bundle install --without development
bundle exec omnibus build chef -l debug
And approximately 3 hours later I had a new chef_12.15.27+20161013214455-1_armhf.deb which worked great once installed.
root@beaglebone:/home/omnibus/chef-12.15.27/omnibus/pkg# dpkg -i chef_12.15.27+20161013214455-1_armhf.deb
Selecting previously unselected package chef.
(Reading database ... 82288 files and directories currently installed.)
Preparing to unpack chef_12.15.27+20161013214455-1_armhf.deb ...
Unpacking chef (12.15.27+20161013214455-1) ...
Setting up chef (12.15.27+20161013214455-1) ...
Thank you for installing Chef!
I’ll continue to refine the build process and follow along with new releases of Chef. Now I can move on to the next more important piece, which is actually using the box. Feel free to download it: chef_12.15.27+20161013214455-1_armhf.deb
Posted in chef, linux | Tagged: arm, beaglebone, chef, linux | 4 Comments »
Installing Debian 8.6 on a BeagleBone Black
Posted by mattray on October 14, 2016
 I’ve finally had practical reason to get the BeagleBone Black out of the drawer and start using it as an home server (more later). It’s a nice, quiet little machine with 512 megs of RAM and a 1ghz ARM CPU. I followed the instructions from https://beagleboard.org/getting-started to connect to it via the serial port over USB, which allowed me to connect to the web server on the included OS. Turns out I didn’t really need to do this, all I needed to do was flash my microSD card and install Debian on it.
For more in-depth Linux notes, I referred to http://elinux.org/Beagleboard:BeagleBoneBlack
I downloaded the latest Debian stable “Jessie” build for ARMHF from here. That image turned out to be a bit bloated with X and desktop tools, so I switched to the “IOT” image. I flashed the image onto a 32 gig microSD card with Etcher for OSX, which was quite painless.
Debian on the BeagleBone Black
Next I popped the microSD card into the BeagleBone and rebooted into Debian. I was able to connect to the serial console over USB with instructions from here. For my instance, the command was
screen /dev/tty.usbmodem1413
I changed the debian user password away from the default and plugged in a network cable.
Once it was on the network I could SSH to it, I probably didn’t need to use the serial console at all if I’d just looked for the IP address off the router.
I copied over my SSH key so I wouldn’t need to use my password when logging in.
scp ~/.ssh/id_rsa.pub debian@192.168.0.11:~/.ssh/authorized_keys
Next I did an apt-get update; apt-get upgrade to get the latest bits and then shut it down.
I plugged directly into the router and powered via the USB port, since it’s meant to be an externally-accessible bastion box.
Final touches
I also needed to make sure we used the whole microSD, so I followed these instructions:
cd /opt/scripts/tools/
git pull
sudo ./grow_partition.sh
sudo reboot
I checked the list of timezones and set mine to Sydney.
timedatectl list-timezones
sudo timedatectl set-timezone Australia/Sydney
and finally
apt-get install emacs-nox
Now it was ready to use.
Posted in geekery, linux, Uncategorized | Tagged: beaglebone, linux | 1 Comment »
Automatic Wi-Fi Switching Based on Running Applications in OSX
Posted by mattray on August 11, 2015
I’ve been a longterm user and big fan of the program ControlPlane, which uses information from the environment around you (attached devices, location, networks, etc.) to change configurations in response. In my own usage, I change Time Machine backup drives based on which networks I’m on and use it to automatically start a handful of applications when I get to work (Emacs, Slack, etc.).

At my current office I have a pretty poor Internet setup because we’re subleasing and don’t have a permanent connection. I’m using a Clear Wireless modem that gets about 10/1Mb/s down/up which is usually fine except for the fact that I’m now sharing the bandwidth with coworkers and Sprint is actively taking down the WIMAX network as they phase out this service. Luckily one of my coworkers has a MIFI puck that does a speedy 20/4Mb/s, but it’s not an unlimited data plan like the Clear modem.
The Problem
I do a lot of video conferencing and our current tool of choice is Zoom. Compared to the other tools we’ve used over the years, it’s really great but with the strain on our network I’ve been having a lot of pauses and stutters on the slower network.
The Solution
Unfortunately there’s not a built-in “Wi-Fi Network” option in ControlPlane, only Network Locations. Network Locations under the Network preference pane don’t allow you to have a single Wi-Fi network choice, so I looked elsewhere. It turns out you can change networks from the CLI, the actual command you use (originally found here) is:
networksetup -setairportnetwork en0 WIFI_SSID_I_WANT_TO_JOIN WIFI_PASSWORD
With that bit of knowledge I created a pair of shell scripts to switch between the two Wi-Fi options.
|

|

|
The Result
The Internet is still pretty poor in my office, but now when I start up Zoom there’s a brief hiccup as the Wi-Fi switches over to the faster wireless provider. When I shut down Zoom I automatically switch back to the slower, unlimited bandwidth Clear network. Hopefully we’ll be getting a new office soon with a dedicated Internet connection with a lot more bandwidth, but this is a decent work-around in the meantime.
Posted in Uncategorized | Leave a Comment »
ZoneMinder Chef Cookbook
Posted by mattray on February 20, 2014

D-Link 930L
A recent rash of burglaries in my neighborhood encouraged me to set up a security camera for my front door. I’d recently heard the FLOSS Weekly episode for ZoneMinder, so I figured I would check it out. The wiki listed the D-Link 930L as an working option, and it was about $40 on Amazon. It is wifi-connected and does 640×480 video, so it’s a pretty good basic solution. I plugged it in, set it up and everything “just worked”. Rather than subscribe to D-Link’s cloud service, I configured ZoneMinder to record video when motion was detected. The Android app actually lets me see the video live from anywhere and I’ve hooked it up to my Roku as well.
I published a Chef cookbook for installing and configuring ZoneMinder, following the configuration guide. The monitor configuration is stored in the database and I didn’t feel like spending the time to set that up, so the cookbook is pretty basic since additional configuration was done in the web UI. The code for the cookbook is at https://github.com/mattray/zoneminder-cookbook
Here are screenshots of the configuration screens:

Monitor: General Settings

Monitor: Source

ZoneMinder: Options
Posted in chef, geekery, monitoring | Tagged: chef, cookbook, webcam, zoneminder | 3 Comments »
Treadmill Desk
Posted by mattray on January 30, 2014

A little over a year ago I decided to build a treadmill desk based on the design at treadmilldeskdiary.com. I’d been having back issues (since resolved surgically) and figured the additional exercise would be good for that and better health in general. I followed treadmilldeskdiary.com‘s setup almost verbatim, the same model of treadmill ($250 on Amazon) and silencing the alarm. The default setting of 1 mile per hour is perfect for a walking desk and the timer conveniently runs for 30 minutes. I already had the IKEA bookshelves and purchased the tabletop with legs for less than $50 total. I wall mounted my monitor and have another on my desk next to the treadmill desk. I switch video cables to my laptop and physically move my keyboard and trackball when I move between desks.
Walking on the treadmill while working is not as distracting as you might expect, I have enough focus for reading and responding to email, browsing the web or talking on the phone. I typically start my day with a half hour on the treadmill doing email and catching up on the latest news, occasionally I eat lunch while walking. If I’m on a conference or phone call the chances are very good I am on my treadmill. My decidedly low-tech approach to tracking time and distance are tick-marks on a post-it note (each half an hour at 1 mph). I typically average at least an hour a day, despite travel and a few weeks of recovery for back surgery I walked 199.5 miles in 2013.

The treadmill is quiet and the maintenance is simple. Luckily I have a private office with plenty of space, so I don’t annoy my coworkers except while video conferencing. If your working arrangement is amenable to it, I highly recommend a treadmill desk.
UPDATE: Only 85.5 miles in 2014, a bit more travel and feeling better lead to less mileage. Gonna shoot for more in 2015.
UPDATE 2: Only 44.5 miles in 2015, too much travel but still feeling good. 2016 probably will be about the same.
UPDATE 3: Only 26 miles in 2016, that’s because I packed up the treadmill and moved to Australia mid-year.
Posted in geekery, health | Tagged: desk, treadmill, work | 3 Comments »
